Now Reading: Essential Streaming Gear for Beginners
-
01
Essential Streaming Gear for Beginners
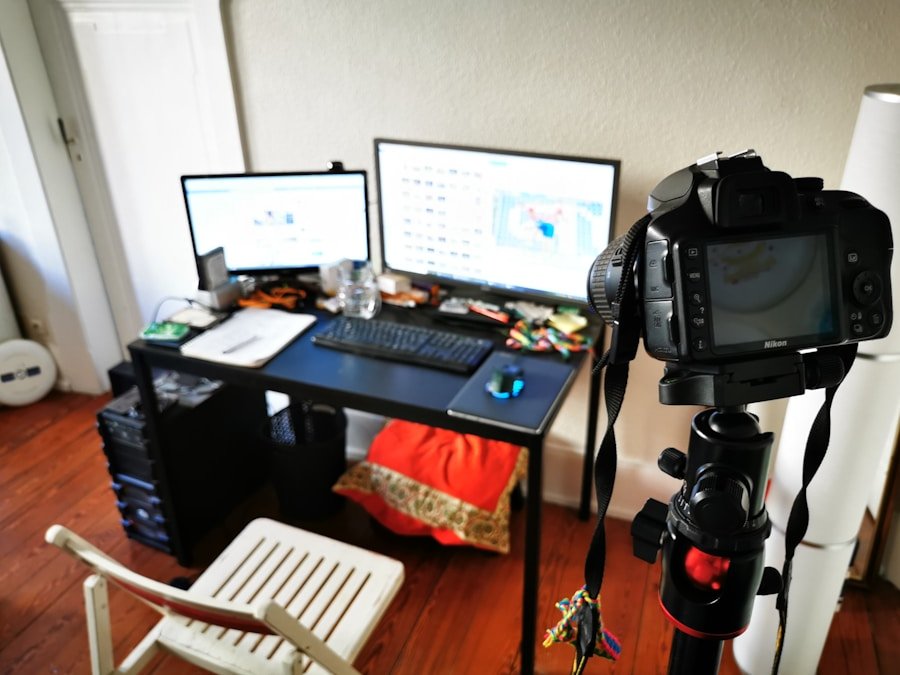
When it comes to creating high-quality video content, selecting the right camera is paramount. I often find myself overwhelmed by the myriad of options available, from DSLRs to mirrorless cameras and even compact camcorders. Each type has its own set of advantages and disadvantages, which can significantly impact the final product.
For instance, I appreciate the versatility of a mirrorless camera, which offers excellent video quality and interchangeable lenses, allowing me to adapt to various shooting conditions. On the other hand, I sometimes lean towards a DSLR for its robust build and familiarity, especially when I need to capture still images alongside video. In my experience, it’s essential to consider not just the camera’s resolution but also its frame rate capabilities.
A camera that can shoot in 4K at 60 frames per second provides a level of detail and smoothness that is hard to beat. Additionally, I pay close attention to the camera’s low-light performance, as many of my shoots occur in less-than-ideal lighting conditions. Ultimately, I strive to find a balance between my budget and the features that will best serve my creative vision.
Whether I’m filming a vlog, a tutorial, or a short film, the right camera can make all the difference in achieving the professional look I desire.
Key Takeaways
- Choose a camera that suits your needs and budget, considering factors like resolution, frame rate, and lens options.
- Select a microphone that complements your camera setup and provides clear, high-quality audio for your streams or recordings.
- Find the ideal lighting setup to ensure well-lit and professional-looking videos, considering factors like color temperature and brightness.
- Understand the role of audio interfaces and mixers in improving sound quality and managing multiple audio sources for your content.
- Navigate streaming software to customize your broadcast, manage multiple inputs, and engage with your audience effectively.
- Set up a green screen to create a professional and customizable background for your videos or streams.
- Utilize a tripod or mounting system to stabilize your camera and achieve steady, professional-looking shots.
- Explore additional accessories like external monitors, battery packs, and camera cages to enhance your setup and improve your content creation process.
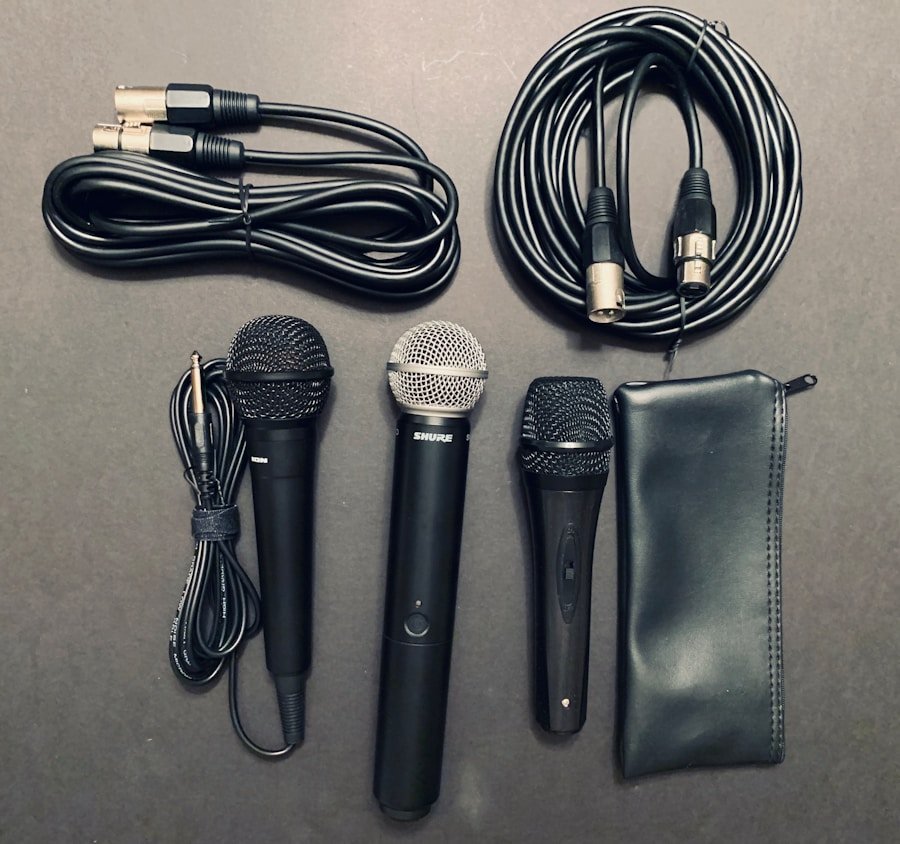
Selecting the Best Microphone
Audio quality is just as crucial as video quality, if not more so. I’ve learned that even the most stunning visuals can be undermined by poor sound. Therefore, selecting the best microphone for my needs is a task I take seriously.
There are various types of microphones available, including lavalier mics, shotgun mics, and condenser mics, each suited for different scenarios. For instance, when I’m filming interviews or on-the-go content, I often opt for a lavalier microphone due to its discreet nature and ability to capture clear audio from the subject without being intrusive. Conversely, when I’m shooting narrative pieces or need to capture ambient sounds, a shotgun microphone becomes my go-to choice.
Its directional capabilities allow me to focus on specific sounds while minimizing background noise. I also consider factors such as connectivity—whether I need a USB mic for direct computer input or an XLR mic for use with an audio interface. Ultimately, investing in a quality microphone has transformed my projects, elevating the overall production value and ensuring that my audience can fully engage with my content.
Finding the Ideal Lighting Setup
Lighting is often referred to as the unsung hero of video production, and I couldn’t agree more. The right lighting setup can dramatically enhance the mood and clarity of my videos. I’ve experimented with various lighting techniques, from natural light to artificial sources like softboxes and ring lights.
Natural light can be beautiful and flattering, but it’s not always reliable; therefore, I’ve learned to supplement it with artificial lighting to maintain consistency across my shoots. One of my favorite setups involves using three-point lighting: key light, fill light, and backlight. The key light serves as the primary source of illumination, while the fill light softens shadows created by the key light.
The backlight adds depth by separating the subject from the background. This combination creates a professional look that enhances my videos significantly. Additionally, I pay attention to color temperature; using lights with adjustable color settings allows me to match the ambient light in my shooting environment seamlessly.
With the right lighting setup, I can create an inviting atmosphere that draws viewers into my content.
Understanding Audio Interfaces and Mixers
As I delve deeper into video production, I’ve come to appreciate the importance of audio interfaces and mixers in achieving high-quality sound. An audio interface acts as a bridge between my microphones and computer, converting analog signals into digital data that can be processed by my editing software. This is particularly useful when I’m using multiple microphones or instruments simultaneously.
Investing in a reliable audio interface has allowed me to capture cleaner sound with less latency, which is crucial during recording sessions. Mixers also play a vital role in my audio workflow. They enable me to adjust levels on-the-fly and add effects like reverb or EQ before recording.
This flexibility is invaluable during live streams or multi-person interviews where balancing sound levels can be challenging. I’ve found that understanding how to use these tools effectively has elevated my audio production skills significantly. By mastering audio interfaces and mixers, I can ensure that my sound quality matches the high standards of my visual content.
Navigating Streaming Software
In today’s digital landscape, streaming has become an integral part of content creation. As I explore this realm, navigating streaming software has become essential for delivering engaging live broadcasts. There are several platforms available, such as OBS Studio and Streamlabs OBS, each offering unique features tailored to different needs.
I’ve spent time experimenting with these tools to find which one aligns best with my workflow and technical requirements. One aspect I particularly enjoy is customizing my streaming layout. With features like scene transitions and overlays, I can create a visually appealing experience for my audience.
Additionally, integrating chat features allows me to interact with viewers in real-time, fostering a sense of community around my content. However, I’ve also learned that technical issues can arise during live streams; therefore, having a solid understanding of my chosen software is crucial for troubleshooting on the fly. By mastering streaming software, I can elevate my live broadcasts and connect more meaningfully with my audience.
Setting Up a Green Screen
The use of green screens has revolutionized how I approach video production. They provide endless possibilities for backgrounds and settings without the need for extensive location shoots. Setting up a green screen requires careful attention to detail; lighting is particularly important to avoid shadows or uneven color on the screen itself.
I’ve found that using soft lighting helps create an even wash of color across the green fabric, making it easier for post-production software to key out the background effectively. Once the green screen is properly lit and positioned, I can unleash my creativity during editing. Whether I want to transport myself to a bustling cityscape or a serene beach setting, the possibilities are virtually limitless.
However, achieving a clean keying effect requires practice and patience; I’ve spent hours fine-tuning settings in post-production software to ensure that edges are crisp and realistic. The ability to manipulate backgrounds has added a new dimension to my storytelling capabilities, allowing me to create immersive experiences for my viewers.
Utilizing a Tripod or Mounting System
Stability is key when it comes to capturing smooth video footage, which is why utilizing a tripod or mounting system has become an essential part of my setup. A sturdy tripod allows me to achieve steady shots without any unwanted shaking or movement that could distract viewers from the content itself. When filming interviews or tutorials, having a reliable tripod ensures that I can focus on delivering quality content rather than worrying about camera stability.
In addition to traditional tripods, I’ve also explored various mounting systems such as gimbals and sliders for dynamic shots. Gimbals provide stabilization for moving shots, allowing me to create cinematic sequences that enhance storytelling. Sliders enable smooth panning movements that add depth and interest to static shots.
By incorporating these tools into my workflow, I can elevate the production value of my videos significantly while maintaining creative control over how each scene is captured.
Exploring Additional Accessories
As I continue to refine my video production skills, I’ve discovered that additional accessories can greatly enhance both functionality and creativity in my projects. Items like external monitors allow me to see what I’m filming in greater detail while providing better focus control during shoots.
Another accessory I’ve found invaluable is a portable reflector; it helps bounce light onto subjects when natural light is limited or when I’m shooting outdoors during harsh sunlight conditions. Additionally, investing in quality cables and adapters ensures that all my equipment works seamlessly together without any technical hiccups during shoots or live streams. By exploring these additional accessories, I’ve been able to expand my creative toolkit and improve the overall quality of my video productions.
In conclusion, navigating the world of video production requires careful consideration of various elements—from choosing the right camera and microphone to understanding lighting setups and audio interfaces. Each component plays a vital role in creating high-quality content that resonates with viewers. As I continue on this journey, I’m excited about exploring new technologies and techniques that will further enhance my skills and elevate my storytelling capabilities in this ever-evolving landscape.
If you’re looking to level up your gaming skills beyond just streaming, you might want to check out this article on mastering your aim and reflexes in FPS games.
FAQs
What is streaming gear?
Streaming gear refers to the equipment and tools used to broadcast live video and audio content over the internet. This can include cameras, microphones, lighting, and software.
What are some essential streaming gear for beginners?
Some essential streaming gear for beginners includes a good quality webcam or camera, a microphone for clear audio, proper lighting, and a stable internet connection. Additionally, a computer or streaming device and streaming software are also necessary.
What type of camera is best for streaming?
For beginners, a good quality webcam or a DSLR camera with a clean HDMI output can be a great option for streaming. These cameras provide high-quality video and are relatively easy to set up and use.
What kind of microphone should beginners use for streaming?
For streaming, beginners can use a USB microphone or a headset with a built-in microphone. These options provide good audio quality and are easy to set up with a computer or streaming device.
How important is lighting for streaming?
Good lighting is crucial for streaming as it can greatly improve the overall quality of the video. Proper lighting helps to eliminate shadows and ensures that the subject is well-lit and clearly visible.
What software is recommended for beginners for streaming?
For beginners, popular streaming software options include OBS Studio, Streamlabs OBS, and XSplit. These software programs are user-friendly and offer a range of features for streaming and recording content.


Pingback: Level Up: Best Gaming Events of 2025
Pingback: Most Anticipated Games Releasing Late 2025