Now Reading: Transform Your Living Room into a Gaming Lounge
-
01
Transform Your Living Room into a Gaming Lounge
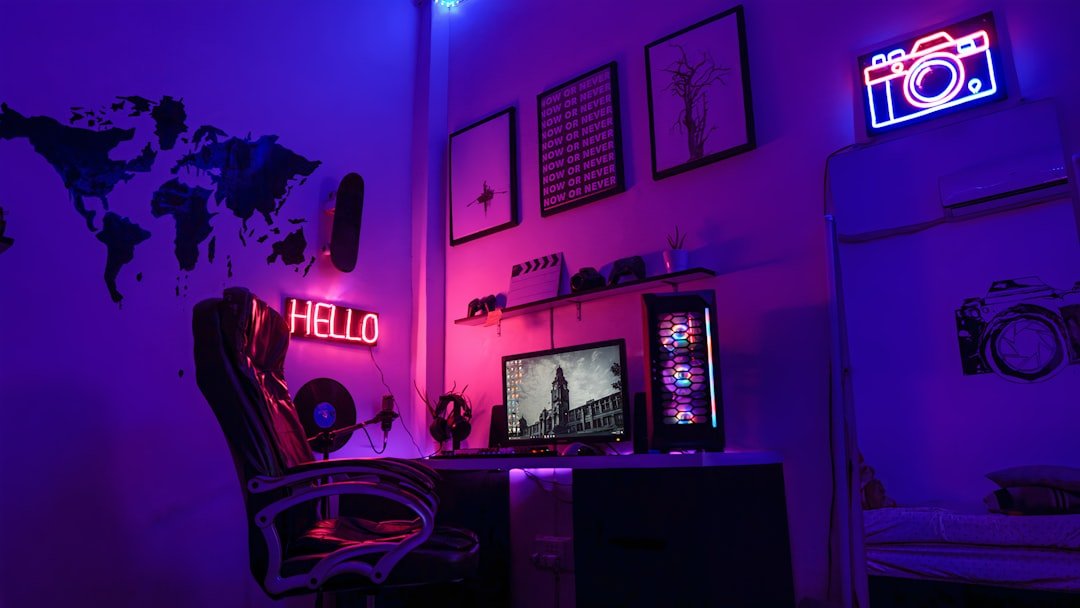
When I set out to create my ideal gaming lounge, the first step was selecting the right furniture. I quickly realized that comfort and functionality were paramount. I began by researching various types of gaming chairs, ultimately opting for one that offered ergonomic support.
After all, long hours of gaming can take a toll on the body, and I wanted to ensure that I could enjoy my sessions without discomfort. The chair I chose not only had adjustable features but also came with built-in speakers and vibration feedback, enhancing my gaming experience. In addition to the chair, I needed a sturdy desk that could accommodate my gaming setup.
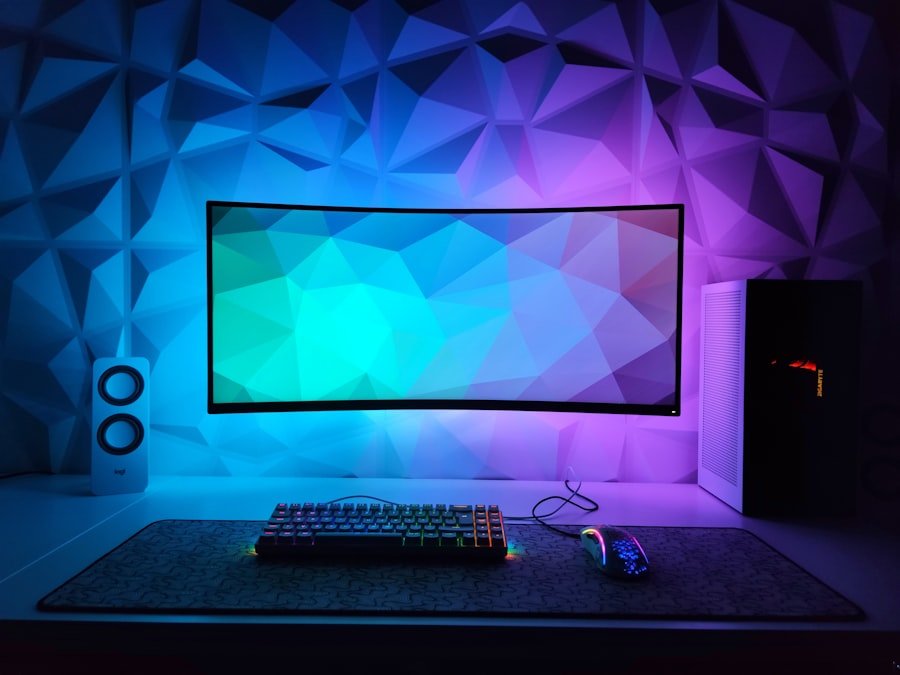
I found a sleek, modern desk with ample surface area for my monitor, keyboard, and other peripherals. The desk also had cable management features, which helped keep my space tidy and organized. I made sure to choose furniture that complemented the overall aesthetic of my gaming lounge, opting for a color scheme that reflected my personal style while still being functional.
The right furniture not only enhances the gaming experience but also sets the tone for the entire room.
Key Takeaways
- Choose furniture that is comfortable and ergonomic for long gaming sessions
- Set up your gaming station in a well-ventilated and well-lit area to reduce eye strain
- Create a seating area with plush chairs and sofas for relaxation during breaks
- Incorporate gaming decor such as posters, figurines, and themed artwork to personalize your space
- Install gaming accessories like shelves, hooks, and cable management systems to keep your space organized and clutter-free
- Maximize sound and lighting with surround sound systems and adjustable lighting options for an immersive gaming experience
- Organize gaming storage with shelves, cabinets, and storage bins to keep games, controllers, and accessories tidy
- Add multiplayer gaming options such as extra controllers, comfortable seating, and a large screen for group gaming sessions
- Incorporate snack and beverage stations with mini-fridges, snack organizers, and comfortable seating for convenience during gaming sessions
- Create a gaming schedule to balance gaming time with other activities and responsibilities
- Maintain and clean your gaming lounge regularly to keep it inviting and comfortable for long-term use
Setting Up the Perfect Gaming Station
Optimizing Keyboard and Mouse Placement
The placement of my keyboard and mouse was equally important; I ensured they were within easy reach and positioned them ergonomically to enhance my gameplay.
Adding Essential Accessories
To complete my gaming station, I added a few essential accessories. A mouse pad with wrist support became a must-have, as it provided additional comfort during long gaming marathons. I also incorporated a multi-port USB hub to keep all my devices connected without cluttering my desk with cables.
The Final Result
With everything in place, I took a moment to step back and admire my setup. It was not just functional; it was a space that inspired me to dive into new adventures and challenges.
Creating a Comfortable Seating Area
While my gaming station was essential, I knew that creating a comfortable seating area for friends and family was equally important. I envisioned a cozy nook where we could gather for multiplayer sessions or simply hang out between games. To achieve this, I selected a couple of plush bean bags and a small couch that invited relaxation. The seating arrangement was designed to encourage conversation and camaraderie, making it easy for everyone to join in on the fun.
To enhance the atmosphere of this seating area, I added soft throw pillows and blankets in vibrant colors that matched the overall theme of my gaming lounge. This not only made the space more inviting but also provided extra comfort during those long gaming nights. I also placed a small coffee table in the center, perfect for holding snacks or drinks while we played.
With this comfortable seating area in place, I felt confident that my gaming lounge would be a welcoming space for both casual gamers and serious competitors alike.
Incorporating Gaming Decor
As I continued to develop my gaming lounge, I realized that decor played a significant role in creating an immersive environment. I wanted to surround myself with elements that reflected my passion for gaming while also adding personality to the space. To start, I hung framed posters of my favorite games on the walls, creating a gallery that showcased iconic artwork and characters.
This not only personalized the room but also served as inspiration during gameplay. In addition to posters, I incorporated various collectibles and figurines on shelves around the room. These items served as conversation starters and added character to the space.
I also considered lighting as an essential aspect of decor; LED strip lights along the edges of shelves and behind the monitor created an ambient glow that enhanced the overall atmosphere. By carefully curating these decorative elements, I transformed my gaming lounge into a vibrant sanctuary that truly reflected my love for gaming.
Installing Gaming Accessories
With the foundational elements of my gaming lounge established, it was time to focus on installing essential gaming accessories that would elevate my experience further. One of the first additions was a high-quality headset with surround sound capabilities. This accessory allowed me to immerse myself fully in the game world while providing clear communication with teammates during multiplayer sessions.
The comfort of the headset was also crucial; I made sure it had adjustable features to accommodate long hours of wear. Another accessory that proved invaluable was a gaming controller charging station. This simple addition kept my controllers organized and ready for action at all times.
I also invested in a quality webcam for streaming purposes, allowing me to share my gameplay with friends and followers online. By thoughtfully selecting these accessories, I ensured that my gaming lounge was equipped with everything needed for an optimal gaming experience.
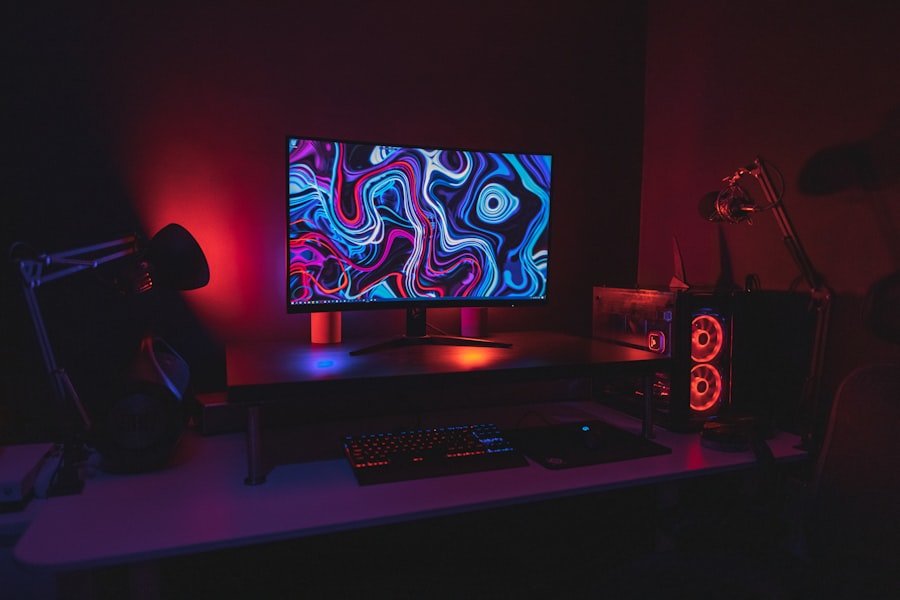
Maximizing Sound and Lighting
Immersive Soundscapes
To maximize sound quality, I invested in a surround sound system that enveloped me in rich audio during gameplay. This system not only enhanced my immersion but also made it easier to pick up on subtle audio cues within games. I strategically placed speakers around the room to create an immersive soundscape that complemented my gaming sessions.
Dynamic Lighting
In addition to the LED strip lights I had already installed, I added smart bulbs that allowed me to customize the color and intensity based on my mood or the game I was playing. For instance, during intense action sequences, I could switch to vibrant reds or blues, while more relaxed moments called for softer hues.
A Transformative Gaming Experience
This dynamic lighting setup transformed my gaming lounge into an adaptable environment that catered to various gaming experiences. With the ability to customize sound and lighting, I was able to create a truly immersive and engaging gaming atmosphere.
Organizing Gaming Storage
As my collection of games and accessories grew, so did the need for effective storage solutions within my gaming lounge.
To tackle this challenge, I invested in shelving units specifically designed for game storage.
These shelves not only held physical copies of games but also provided space for consoles and other equipment. In addition to shelving units, I utilized storage bins and baskets to keep smaller items organized. Cables, controllers, and other peripherals were neatly tucked away yet easily accessible when needed.
Labeling these storage solutions helped me quickly find what I was looking for without rummaging through piles of equipment. By prioritizing organization within my gaming lounge, I created an efficient space that allowed me to focus on what truly mattered: enjoying my games.
Adding Multiplayer Gaming Options
One of the most enjoyable aspects of gaming is sharing experiences with friends and family, so adding multiplayer options was essential for my lounge setup. To facilitate this, I ensured that my console could support multiple controllers and had enough space for everyone to gather comfortably around the screen. Additionally, I invested in a second monitor for local multiplayer games; this allowed us to play side by side without crowding around one screen.
I also explored various multiplayer games across different genres to cater to diverse tastes among friends who visited my lounge. From competitive shooters to cooperative adventures, having a variety of options ensured that there was something for everyone. By creating an inviting atmosphere for multiplayer gaming, I fostered connections and camaraderie among friends while making lasting memories together.
Incorporating Snack and Beverage Stations
No gaming session is complete without snacks and beverages on hand, so incorporating dedicated stations into my lounge was a no-brainer. I set up a small bar cart stocked with an assortment of drinks ranging from sodas to energy drinks, ensuring everyone had their favorite refreshment within reach during gameplay. This cart became a focal point during gatherings, encouraging friends to help themselves while keeping our focus on the games.
For snacks, I designated a corner of the room with jars filled with popcorn, chips, and candy—perfect for quick bites between matches or during intense gaming marathons. Having these stations readily available not only kept us fueled but also added an element of fun to our gaming sessions. It became customary for us to take snack breaks together, sharing laughs and stories while recharging before diving back into our virtual worlds.
Creating a Gaming Schedule
To make the most out of my gaming lounge experience, I decided to create a gaming schedule that balanced solo playtime with multiplayer sessions with friends. This schedule allowed me to allocate specific days for diving into single-player campaigns while reserving weekends for group gatherings or online play with friends who lived farther away. By establishing this routine, I ensured that I could enjoy both aspects of gaming without feeling overwhelmed or guilty about neglecting one over the other.
I also encouraged friends to join in on this schedule by coordinating game nights where we could all come together virtually or in person. This not only fostered accountability but also built excitement around upcoming releases or events within our favorite games. By creating a structured yet flexible gaming schedule, I found myself more engaged in both solo adventures and multiplayer escapades.
Maintaining and Cleaning Your Gaming Lounge
Finally, maintaining and cleaning my gaming lounge became an essential part of preserving its inviting atmosphere. Regularly dusting surfaces and vacuuming the floor helped keep the space tidy and comfortable for both myself and guests. Additionally, I made it a habit to wipe down equipment after each use; this ensured that controllers remained clean and free from grime accumulated during intense gameplay sessions.
I also established a routine for organizing storage areas every few weeks—this included checking cables for tangles or damage and ensuring all items were returned to their designated spots after use. By prioritizing maintenance and cleanliness within my gaming lounge, I created an environment that remained welcoming and enjoyable over time. In conclusion, creating the ultimate gaming lounge is an exciting journey filled with thoughtful decisions about furniture selection, decor choices, and organization strategies.
By focusing on comfort, functionality, and aesthetics while incorporating essential accessories and features tailored to both solo play and multiplayer experiences, I’ve crafted a space that truly reflects my passion for gaming—a sanctuary where unforgettable memories are made with friends and family alike.
If you’re looking to enhance your gaming experience even further, you may want to check out this article on the ultimate weapon upgrade guide to enhance your arsenal. This guide will help you level up your gaming skills and make your gaming lounge even more impressive. From upgrading weapons to mastering new techniques, this article has everything you need to take your gaming setup to the next level.
FAQs
What are the essential elements for turning a living room into a gaming lounge?
To turn your living room into a gaming lounge, you will need comfortable seating, a large TV or monitor, a gaming console or PC, good lighting, and storage for games and accessories.
How can I create a comfortable seating arrangement in my gaming lounge?
You can create a comfortable seating arrangement in your gaming lounge by investing in a comfortable couch or sectional, gaming chairs, bean bags, or floor cushions. It’s important to have enough seating for everyone who will be using the space.
What kind of lighting is best for a gaming lounge?
The best lighting for a gaming lounge is adjustable and dimmable lighting. You can use floor lamps, table lamps, or smart lighting systems to create the perfect ambiance for gaming.
How can I organize and store my games and gaming accessories in the lounge?
You can organize and store your games and gaming accessories in the lounge by using shelves, cabinets, or storage ottomans. It’s important to keep everything organized and easily accessible for a seamless gaming experience.
What are some decor ideas for a gaming lounge?
Some decor ideas for a gaming lounge include gaming-themed wall art, posters, or decals, LED strip lights, and gaming-related collectibles or memorabilia. You can also incorporate a theme based on your favorite games or gaming genres.