Now Reading: Safely Overclock Your GPU: A Beginner’s Guide
-
01
Safely Overclock Your GPU: A Beginner’s Guide
Overclocking is a term that often sparks excitement and curiosity among computer enthusiasts and gamers alike. At its core, overclocking refers to the practice of increasing the clock speed of a computer’s CPU or GPU beyond the manufacturer’s specifications. This process can lead to enhanced performance, allowing for smoother gameplay, faster rendering times, and an overall more responsive system.
However, it is essential to grasp the fundamental principles behind overclocking before diving into the technicalities. When I first encountered overclocking, I was fascinated by the potential it held for unlocking additional performance from my hardware. The idea that I could push my components to their limits and achieve results that exceeded standard benchmarks was incredibly appealing.
However, I quickly learned that overclocking is not merely about cranking up the numbers; it requires a solid understanding of how computer components function and interact with one another. Each CPU and GPU has a specific architecture, and knowing how to navigate these intricacies is crucial for successful overclocking.
Key Takeaways
- Overclocking involves increasing the clock speed of a computer component to improve performance.
- Choose the right software for overclocking based on compatibility with your hardware and user-friendly interface.
- Monitor temperatures to prevent overheating and potential damage to your hardware.
- Adjust core clock and memory clock settings carefully to achieve optimal performance without causing instability.
- Test stability after overclocking to ensure that the system can handle the increased performance without crashing or encountering errors.
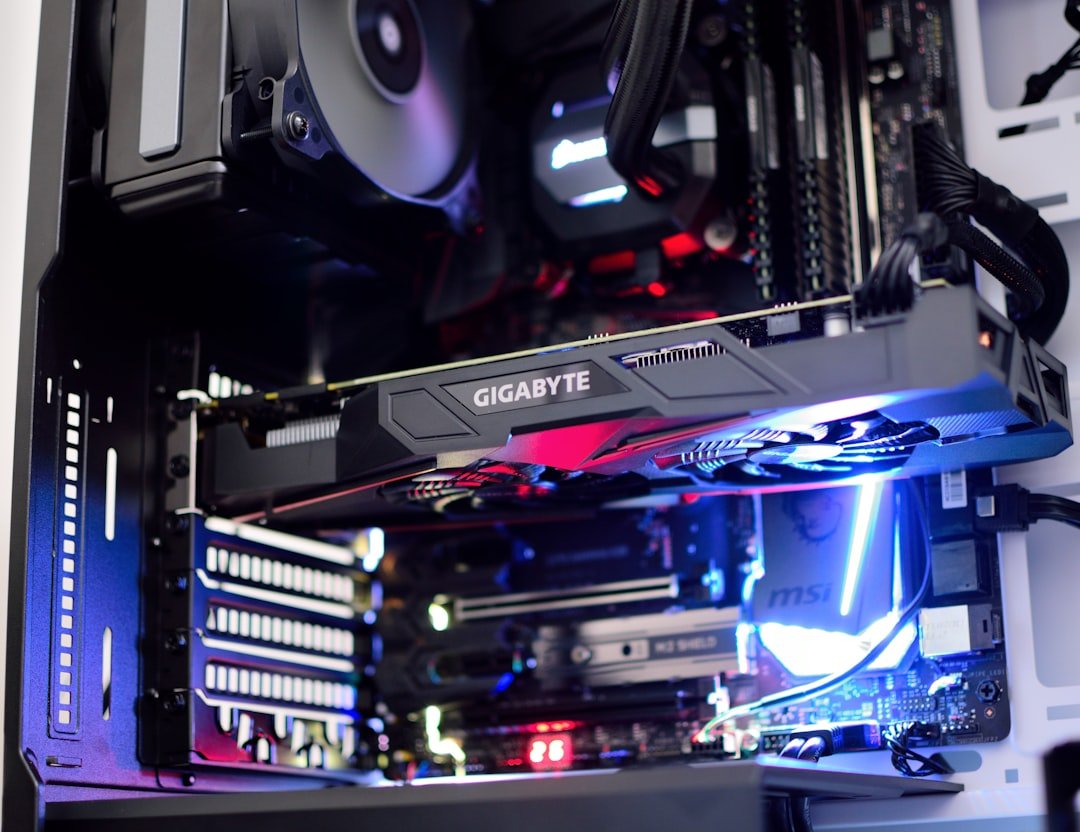
Choosing the Right Software
Selecting the appropriate software for overclocking is a critical step in the process. There are numerous tools available, each offering unique features and capabilities. Some of the most popular options include MSI Afterburner, ASUS GPU Tweak, and Intel XTU for CPUs.
When I began my overclocking journey, I spent considerable time researching these tools to find one that suited my needs and comfort level. I found that user-friendly interfaces were essential for beginners like me. I wanted software that not only provided real-time monitoring of my hardware but also allowed for easy adjustments to clock speeds and voltages.
After experimenting with a few different programs, I settled on MSI Afterburner due to its intuitive layout and comprehensive features. It offered me the ability to tweak my GPU settings while simultaneously monitoring temperatures and performance metrics, which proved invaluable during my overclocking endeavors.
Monitoring Temperatures

One of the most critical aspects of overclocking is keeping a close eye on temperatures. As I delved deeper into the process, I quickly realized that pushing my components beyond their limits could lead to overheating, which could cause permanent damage. Therefore, I made it a priority to monitor temperatures continuously while overclocking.
I discovered that many software tools come equipped with temperature monitoring features, allowing me to track the thermal performance of my CPU and GPU in real time. Additionally, I invested in a reliable hardware monitoring tool that provided more detailed insights into temperature fluctuations. This combination of software and hardware monitoring gave me peace of mind as I pushed my components harder than ever before.
I learned that maintaining optimal temperatures is crucial for stability and longevity, so I made it a habit to check temperatures frequently during my overclocking sessions.
Adjusting Core Clock and Memory Clock
Once I felt confident in my understanding of overclocking and had established a solid monitoring system, it was time to start adjusting the core clock and memory clock settings. The core clock refers to the speed at which the CPU or GPU operates, while the memory clock pertains to the speed of the memory used by these components. Both play a significant role in overall performance, and finding the right balance between them is essential.
I began by making small incremental adjustments to the core clock, gradually increasing it by 10-20 MHz at a time. This cautious approach allowed me to gauge how my system responded to each change without risking instability. After each adjustment, I would run benchmarks and stress tests to evaluate performance improvements and ensure that temperatures remained within safe limits.
Once I felt comfortable with the core clock settings, I turned my attention to the memory clock, applying a similar incremental approach. This methodical process helped me achieve a well-rounded overclock while minimizing potential issues.
Testing Stability
After making adjustments to both the core clock and memory clock, I knew it was time to put my overclocked system through its paces with stability testing. Stability testing is crucial because it ensures that the changes I’ve made do not lead to crashes or unexpected behavior during regular use or gaming sessions. I utilized various benchmarking tools such as Prime95 for CPU testing and Unigine Heaven for GPU testing to assess stability.
During this phase, I learned the importance of patience. Stability testing can take hours, but it is essential for identifying any potential issues that may arise from overclocking. If my system crashed or exhibited artifacts during testing, it was a clear sign that I needed to dial back my settings.
Through this process, I gained valuable insights into how my hardware responded under stress and learned to appreciate the delicate balance between performance gains and system stability.
Troubleshooting Common Issues
As I continued my overclocking journey, I encountered several common issues that many enthusiasts face. One of the most frequent problems was system instability, which manifested as crashes or unexpected reboots during gaming or heavy workloads. When this happened, I had to troubleshoot effectively to identify the root cause of the issue.
I found that adjusting voltage settings often played a significant role in resolving instability problems. Increasing the voltage slightly could provide additional power to my CPU or GPU, allowing them to maintain stability at higher clock speeds. However, this required careful consideration since excessive voltage could lead to overheating or damage over time.
Additionally, I learned that sometimes simply reverting back to previous settings could resolve issues without further complications. This troubleshooting experience taught me valuable lessons about patience and adaptability in the world of overclocking.
Understanding the Risks
While overclocking can yield impressive performance gains, it is essential to understand the inherent risks involved in this practice. As I delved deeper into overclocking, I became increasingly aware of potential pitfalls that could arise from pushing my hardware too far. One of the most significant risks is overheating, which can lead to thermal throttling or even permanent damage if not managed properly.
Moreover, overclocking can void warranties on certain components, leaving me responsible for any repairs or replacements needed down the line.
While achieving higher performance was enticing, I understood that it came with responsibilities and potential consequences that could impact my overall computing experience.
Knowing When to Stop
As I gained more experience with overclocking, I learned an invaluable lesson: knowing when to stop is just as important as knowing how to push my hardware further.
During my journey, I found myself at this crossroads several times.
I began to recognize signs that indicated it was time to halt further adjustments—such as consistently high temperatures or diminishing returns on performance gains despite increased clock speeds. By setting personal limits based on temperature thresholds and stability benchmarks, I was able to enjoy enhanced performance without compromising the integrity of my system. Ultimately, understanding when to stop became a crucial aspect of my overclocking philosophy, allowing me to strike a balance between performance enhancement and system reliability.
In conclusion, overclocking can be an exhilarating journey filled with opportunities for performance enhancement and personal growth as a computer enthusiast. By understanding its principles, choosing the right software, monitoring temperatures diligently, adjusting clock speeds carefully, testing stability rigorously, troubleshooting effectively, acknowledging risks, and knowing when to stop, I’ve been able to navigate this complex landscape successfully. Each step has taught me valuable lessons about patience, responsibility, and the delicate balance between pushing boundaries and maintaining stability in my computing experience.
If you’re interested in learning more about the impact of video games on mental health, check out this article that delves into the potential benefits and drawbacks of gaming on mental well-being. It’s important to consider all aspects of gaming, including how it can affect your mental health, as you explore ways to enhance your gaming experience.
FAQs
What is GPU overclocking?
GPU overclocking is the process of increasing the clock speed of a graphics processing unit (GPU) in order to improve its performance and achieve higher frame rates in video games and other graphics-intensive applications.
Is it safe to overclock my GPU?
When done correctly and within safe limits, GPU overclocking can be safe. However, it’s important to follow proper procedures and monitor temperatures to avoid damaging the GPU.
What are the potential risks of GPU overclocking?
The main risks of GPU overclocking include overheating, instability, and potential damage to the GPU if not done properly. Overclocking can also void the warranty of the GPU.
How can I safely overclock my GPU?
To safely overclock your GPU, you should use reliable overclocking software, gradually increase the clock speed and voltage, monitor temperatures, and test for stability using benchmarking tools.
What are some popular GPU overclocking software options?
Popular GPU overclocking software options include MSI Afterburner, EVGA Precision X, and ASUS GPU Tweak. These programs allow users to adjust clock speeds, voltages, and fan settings for their GPUs.
What are some signs that my GPU is being overclocked too aggressively?
Signs that your GPU is being overclocked too aggressively include graphical artifacts, system crashes, and unusually high temperatures. If you experience any of these issues, it’s important to dial back the overclock settings.


Pingback: Score Big: Finding Year-Round Gaming Deals